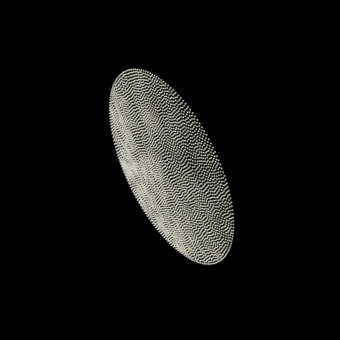
Difference between revisions of "VEX Wrangle Snippets"
Views
Actions
Namespaces
Variants
Tools
 |
|||
| (153 intermediate revisions by the same user not shown) | |||
| Line 1: | Line 1: | ||
== Translate == | == Translate == | ||
[[File:vex_offset_position.gif | 340px | right]] | |||
Offset the position of geometry | Offset the position of geometry | ||
[[:File:vex_offset_position.hiplc|vex_offset_position.hiplc]] | |||
<syntaxhighlight lang='C'> | <syntaxhighlight lang='C'> | ||
@P += { | @P += {1, 0, 0}; | ||
</syntaxhighlight> | </syntaxhighlight> | ||
== Taper == | == Taper == | ||
[[File:taper_vex_001.gif | 340px | right]] | |||
 | |||
 | |||
Reduces the circumference by scaling along the XZ plane based on the height of the geometry. | |||
 | |||
 | |||
 | |||
 | |||
 | |||
[[:File:taper_vex_001.hiplc|taper_vex_001.hiplc]] | |||
 | |||
<syntaxhighlight lang='C'> | <syntaxhighlight lang='C'> | ||
float taper = relbbox(0,@P).y; | float taper = relbbox(0,@P).y; | ||
taper = 1 | // Remap the taper range | ||
taper = fit01(taper, 1, fit01(sin(@Time*PI/5)*0.5+0.5, 2.5, .5)); | |||
// Apply the taper by scaling along the X and Y axis | |||
@P *= set(taper,1,taper); | @P *= set(taper,1,taper); | ||
</syntaxhighlight> | </syntaxhighlight> | ||
== Boxify == | == Boxify == | ||
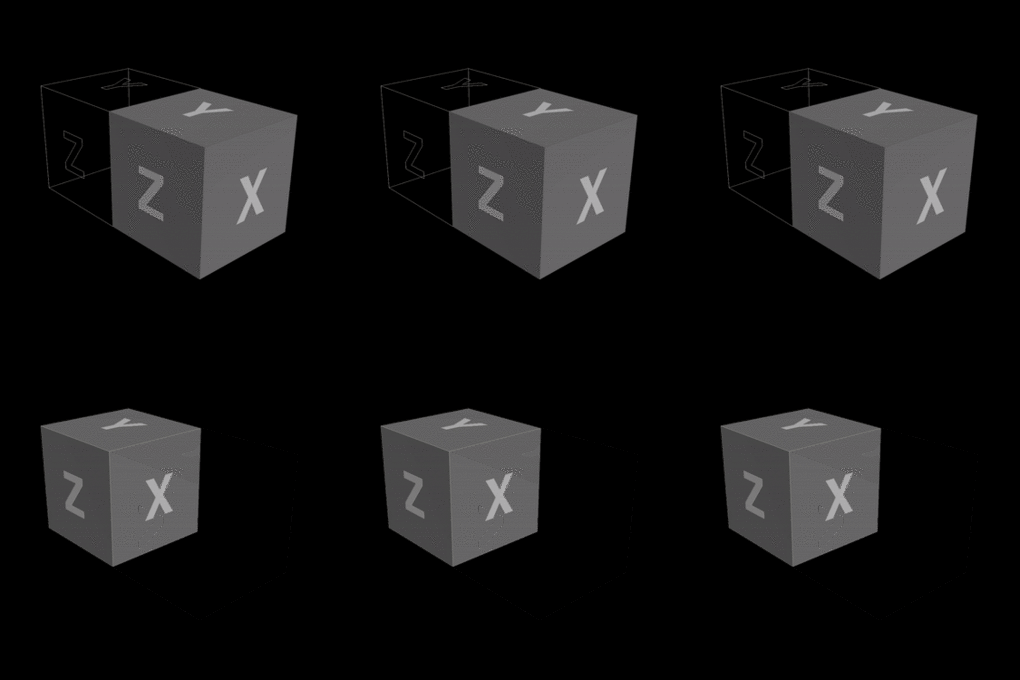
Distorts the geometry into a box shape | [[File:vex_boxify_001.gif | 340px | right]] | ||
 | |||
 | |||
Distorts the geometry, morphing it into a box shape | |||
 | |||
[[:File:vex_boxify_001.hiplc|vex_boxify_001.hiplc]] | |||
<syntaxhighlight lang='C'> | <syntaxhighlight lang='C'> | ||
vector centroid = getbbox_center(0); | vector centroid = getbbox_center(0); | ||
| Line 25: | Line 58: | ||
@P += centroid; | @P += centroid; | ||
</syntaxhighlight> | </syntaxhighlight> | ||
== Spherify == | == Spherify == | ||
[[File:vex_spherify_001.gif | 340px | right]] | |||
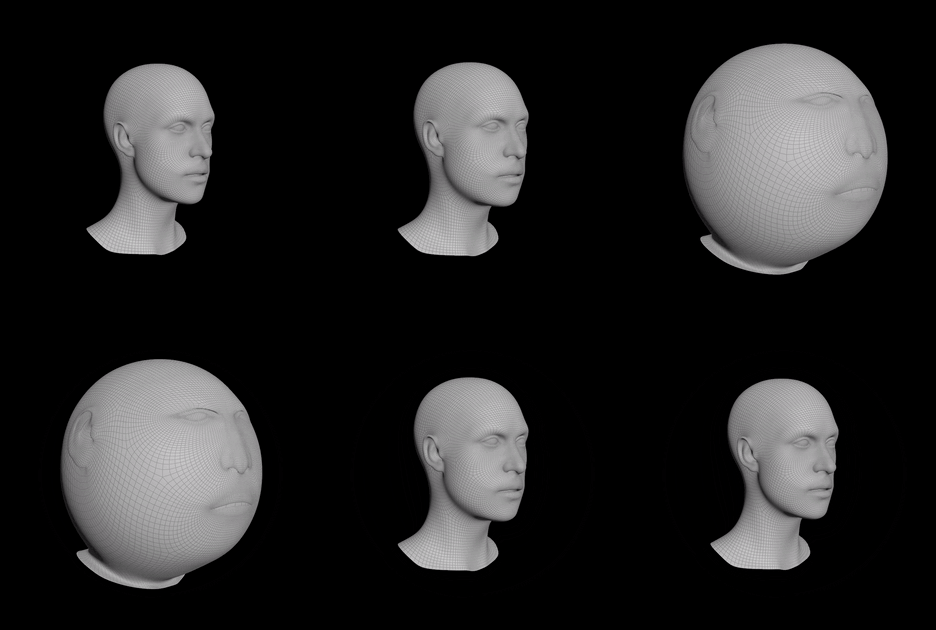
Distorts the geometry into a sphere shape | Distorts the geometry into a sphere shape | ||
[[File: | Â | ||
 | |||
 | |||
 | |||
[[:File:vex_spherify_001.hiplc|vex_spherify_001.hiplc]] | |||
<syntaxhighlight lang='C'> | <syntaxhighlight lang='C'> | ||
vector centroid = getbbox_center(0); | vector centroid = getbbox_center(0); | ||
| Line 41: | Line 80: | ||
== Stretch == | == Stretch == | ||
Stretch the geometry across | [[File:vex_stretch_001.gif | 340px | right]] | ||
Stretch the geometry across it's X axis | |||
 | |||
Add one component of position to itself to stretch the geometry away from it's center. You can control the amount of stretching by multiplying the position before adding it to itself. | |||
 | |||
 | |||
 | |||
 | |||
[[:File:vex_stretch_001.hiplc|vex_stretch_001.hiplc]] | |||
<syntaxhighlight lang='C'> | <syntaxhighlight lang='C'> | ||
@P.x += | vector centroid = getbbox_center(0); | ||
@P -= centroid; | |||
@P.x += @P.x*chf('amt'); | |||
@P += centroid; | |||
</syntaxhighlight> | </syntaxhighlight> | ||
== Shape Blending == | == Shape Blending == | ||
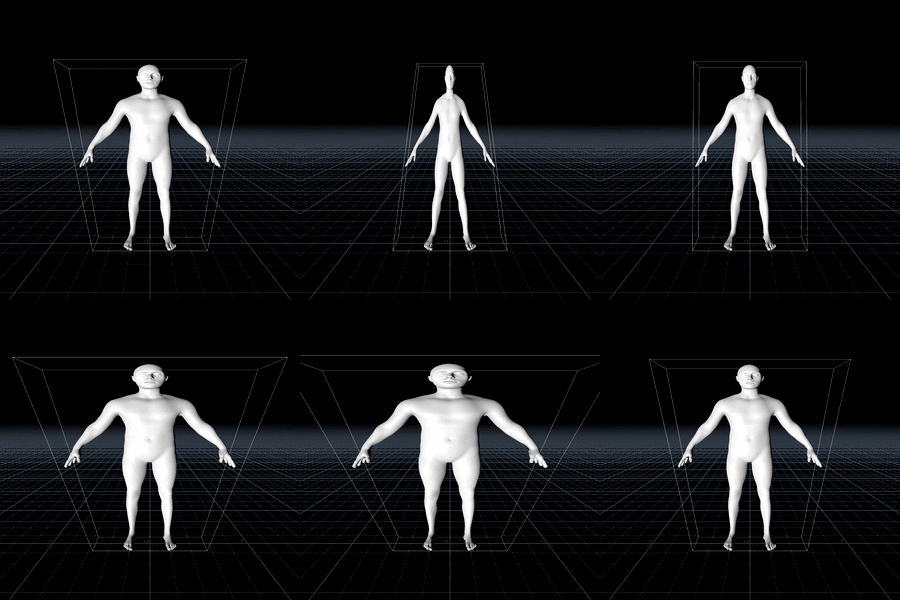
Blend between | [[File:vex_position_blend.gif | 340px | right]] | ||
Blend between point attributes to produce a morph effect | |||
 | |||
 | |||
 | |||
 | |||
 | |||
 | |||
 | |||
 | |||
 | |||
 | |||
 | |||
[[:File:vex_position_blend.hiplc|vex_position_blend.hiplc]] | |||
<syntaxhighlight lang='C'> | <syntaxhighlight lang='C'> | ||
@P = lerp(@P, @opinput1_P, chf('blend')); | @P = lerp(@P, @opinput1_P, chf('blend')); | ||
@N = lerp(@N, @opinput1_N, chf('blend')); | |||
</syntaxhighlight> | </syntaxhighlight> | ||
== Snap to Grid == | == Snap to Grid == | ||
[[File:vex_snap_to_grid.gif | 340px | right]] | |||
Snap ([https://en.wikipedia.org/wiki/Quantization_(signal_processing) quantize]) point positions to a grid for a downres effect | Snap ([https://en.wikipedia.org/wiki/Quantization_(signal_processing) quantize]) point positions to a grid for a downres effect | ||
[[:File:vex_snap_to_grid.hiplc|File:vex_snap_to_grid.hiplc]] | |||
<syntaxhighlight lang='C'> | <syntaxhighlight lang='C'> | ||
float grid_scale = chf('grid_scale'); | float grid_scale = chf('grid_scale'); | ||
@P = rint(@P*grid_scale)/grid_scale; | @P = rint(@P*grid_scale)/grid_scale; | ||
</syntaxhighlight> | |||
== Make 2D == | |||
[[File:vex_setcomp.gif | 340px | right]] | |||
You can use the setcomp function to zero out a component of a vector, resulting in a two dimensional surface. | |||
[[:File:vex_setcomp.hiplc|vex_setcomp.hiplc]] | |||
<syntaxhighlight lang='C'> | |||
// Set the X component to zero, planar 2D in YZ | |||
setcomp(@P, 0, 0); | |||
</syntaxhighlight> | |||
<syntaxhighlight lang='C'> | |||
// Set the Y component to zero, planar 2D in XZ | |||
setcomp(@P, 0, 1); | |||
</syntaxhighlight> | |||
<syntaxhighlight lang='C'> | |||
// Set the Z component to zero, planar 2D in XY | |||
setcomp(@P, 0, 2); | |||
</syntaxhighlight> | </syntaxhighlight> | ||
== Swizzle Coordinate System == | == Swizzle Coordinate System == | ||
[[File:vex_swizzle_vector_components.gif | 340px | right]] | |||
Shuffle the components of a vector using [https://www.sidefx.com/docs/houdini/vex/lang.html#dot-operator swizzle] | |||
[[:File:vex_swizzle_vector_components.hiplc|vex_swizzle_vector_components.hiplc]] | |||
<syntaxhighlight lang='C'> | |||
@P = @P.zyx; | |||
</syntaxhighlight> | |||
<!-- | |||
Switch between Y up and Z up coordinates using [https://www.sidefx.com/docs/houdini/vex/lang.html#dot-operator swizzle] | Switch between Y up and Z up coordinates using [https://www.sidefx.com/docs/houdini/vex/lang.html#dot-operator swizzle] | ||
<syntaxhighlight lang='C'> | <syntaxhighlight lang='C'> | ||
@P = @P.xzy * set(-1,1,1); | @P = @P.xzy * set(-1,1,1); | ||
</syntaxhighlight> | </syntaxhighlight> | ||
--> | |||
== | == Twirl == | ||
[[File:vex_twirl.gif | 340px | right]] | |||
Twirl the geometry around the Y axis | Twirl the geometry around the Y axis | ||
[[:File:vex_twirl.hiplc|vex_twirl.hiplc]] | |||
<syntaxhighlight lang='C'> | |||
float a = chf('angle') * length(@P * {1, 0, 1}); | |||
float u = atan2(@P.x, @P.z); | |||
float r = length(@P * {1, 0, 1}); | |||
@P = set(sin(u-a), @P.y, cos(u-a)) * set(r,1,r); | |||
</syntaxhighlight> | |||
<!-- | |||
<syntaxhighlight lang='C'> | <syntaxhighlight lang='C'> | ||
float angle = chf('angle'); | float angle = chf('angle'); | ||
| Line 120: | Line 253: | ||
@P = set(sin(u-a), @P.y, cos(u-a)) * r; | @P = set(sin(u-a), @P.y, cos(u-a)) * r; | ||
</syntaxhighlight> | </syntaxhighlight> | ||
--> | |||
== Peak == | == Peak == | ||
[[File:vex_push_surface_along_normals.gif | 340px | right]] | |||
Move the surface along it's normals, producing an inflation effect | |||
 | |||
 | |||
 | |||
 | |||
 | |||
 | |||
 | |||
 | |||
 | |||
 | |||
 | |||
 | |||
[[:File:vex_push_surface_along_normals.hip|vex_push_surface_along_normals.hip]] | |||
 | |||
<syntaxhighlight lang='C'> | <syntaxhighlight lang='C'> | ||
@P += normalize(@P) * chf('scale'); | @P += normalize(@P) * chf('scale'); | ||
| Line 128: | Line 280: | ||
== Exploded View == | == Exploded View == | ||
[[File:vex_exploded_view.gif | 340px | right]] | |||
Moves each packed piece outward from the geometry centroid | Moves each packed piece outward from the geometry centroid | ||
[[:File:vex_exploded_view.hiplc|vex_exploded_view.hiplc]] | |||
<syntaxhighlight lang='C'> | <syntaxhighlight lang='C'> | ||
@P += (@P - getbbox_center(0)) * chf('scale'); | @P += (@P - getbbox_center(0)) * chf('scale'); | ||
| Line 134: | Line 301: | ||
== Point Jitter == | == Point Jitter == | ||
[[File:vex_point_jitter.gif | 340px | right]] | |||
Move each point in a random direction with a spherical distribution | |||
 | |||
 | |||
 | |||
 | |||
 | |||
 | |||
 | |||
 | |||
 | |||
 | |||
 | |||
[[:File:vex_point_jitter.hip|vex_point_jitter.hip]] | |||
 | |||
<syntaxhighlight lang='C'> | <syntaxhighlight lang='C'> | ||
@P += sample_sphere_uniform(rand(@elemnum+chf('seed'))) * chf('scale'); | @P += sample_sphere_uniform(rand(@elemnum+chf('seed'))) * chf('scale'); | ||
| Line 140: | Line 321: | ||
== Plexus Effect == | == Plexus Effect == | ||
[[File:vex_plexus.gif | 340px | right]] | |||
Connect nearby points | Connect nearby points | ||
[[:File:vex_plexus.hiplc|vex_plexus.hiplc]] | |||
<syntaxhighlight lang='C'> | <syntaxhighlight lang='C'> | ||
foreach(int pt; nearpoints(0, @P, 0. | foreach(int pt; nearpoints(0, @P, 0.15, 10))Â Â { | ||
   if(pt > @ptnum) |    if(pt > @ptnum) | ||
     addprim(0, 'polyline', @ptnum, pt); |      addprim(0, 'polyline', @ptnum, pt); | ||
| Line 180: | Line 371: | ||
== Random Color from Normal Direction == | == Random Color from Normal Direction == | ||
[[File:vex_rand_color_from_normal_direction.gif | 340px | right]] | |||
Generate random colors based on the surface normal, adjust the multiplier to control the amount of colors | Generate random colors based on the surface normal, adjust the multiplier to control the amount of colors | ||
[[:File:vex_rand_color_from_normal_direction.hiplc|vex_rand_color_from_normal_direction.hiplc]] | |||
<syntaxhighlight lang='C'> | |||
v@Cd = rand(rint(@N*2)); | |||
</syntaxhighlight> | |||
== Group Unshared Edges == | |||
<syntaxhighlight lang='C'> | <syntaxhighlight lang='C'> | ||
int isBorderEdge(int pt0, pt1)Â {Â // test border using half edges | |||
  int hedge = pointhedge(0, pt0, pt1); // try finding hedge | |||
  if (hedge == -1 ) { | |||
    hedge = pointhedge(0, pt1, pt0); // try reversed hedge | |||
    if (hedge == -1 ) return -1; // invalid hedge | |||
  } | |||
  return hedge_equivcount(0, hedge) == 1; // 1 if border edge | |||
} | |||
 | |||
int pps[] = primpoints(0,@primnum); // current primitive's points | |||
for(int i = 0; i<len(pps);Â i++)Â { | |||
  int pt0 = pps[i]; // current pt | |||
  int pt1 = pps[(i-1)%len(pps)]; // next point | |||
  if( isBorderEdge(pt0, pt1) ) { setpointgroup(0, 'border', pps[i], 1); } | |||
} | |||
</syntaxhighlight> | </syntaxhighlight> | ||
== Iterative Face Insetting == | == Iterative Face Insetting == | ||
| Line 210: | Line 435: | ||
== Iridescent Color Function == | == Iridescent Color Function == | ||
[[File:vex_iridescent.gif | 340px | right]] | |||
Produce an iridescent color ramp from any varying value, [https://www.shadertoy.com/view/XlcBR7 from shadertoy] | Produce an iridescent color ramp from any varying value, [https://www.shadertoy.com/view/XlcBR7 from shadertoy] | ||
[[:File:vex_iridescent.hiplc|vex_iridescent.hiplc]] | |||
<syntaxhighlight lang='C'> | <syntaxhighlight lang='C'> | ||
float amt = dot(@N, set(0,1,0))*0.5+0.5; | float amt = dot(@N, set(0,1,0))*0.5+0.5; | ||
| Line 217: | Line 456: | ||
== Rainbow Colors from HSV Colorspace == | == Rainbow Colors from HSV Colorspace == | ||
You can easily control the hue, while keeping the saturation and value the same using | [[File:vex_hsvtorgb_rainbow_001.gif | 340px | right]] | ||
 | |||
 | |||
You can easily control the hue, while keeping the saturation and value the same using the [https://www.sidefx.com/docs/houdini/vex/functions/hsvtorgb.html hsvtorgb] function. | |||
 | |||
This allows you to easily create rainbows, gradients, perform hue rotations and produce complimentary colors. | |||
 | |||
 | |||
 | |||
 | |||
 | |||
 | |||
 | |||
 | |||
 | |||
[[:File:vex_hsvtorgb_rainbow_001.hiplc|vex_hsvtorgb_rainbow_001.hiplc]] | [[:File:vex_hsvtorgb_rainbow_001.hiplc|vex_hsvtorgb_rainbow_001.hiplc]] | ||
<syntaxhighlight lang='C'> | <syntaxhighlight lang='C'> | ||
v@Cd = hsvtorgb( set(relbbox(0,@P).z - @Time/5 + dot(@N,set(0,1,0))/2, 1, 1)); | v@Cd = hsvtorgb( set(relbbox(0,@P).z - @Time/5 + dot(@N,set(0,1,0))/2, 1, 1)); | ||
</syntaxhighlight> | |||
== Rainbow Cycle with frac function == | |||
[[File:rainbow_cycle_w_frac_VEX.gif | 340px | right]] | |||
Using the [https://www.sidefx.com/docs/houdini/vex/functions/frac.html frac] function, you can cycle through a rainbow over a desired amount of elements. | |||
This is then offset by adding the current time to the fractional value, which produces the scrolling effect. | |||
[[:File:vex_frac_rainbow_cycle_001.hiplc|vex_frac_rainbow_cycle_001.hiplc]] | |||
<syntaxhighlight lang='C'> | |||
v@Cd = hsvtorgb(set(frac(@elemnum/8.0)+@Time/10, 1, 1)); | |||
</syntaxhighlight> | </syntaxhighlight> | ||
| Line 241: | Line 513: | ||
== Torus Knot == | == Torus Knot == | ||
[[File:vex_torus_knot_001.gif | 340px | right]] | |||
[https://prideout.net/knotgl/ Online Knot Viewer] | |||
[[:File:vex_torus_knot_001.hiplc|vex_torus_knot_001.hiplc]] | |||
<syntaxhighlight lang='C'> | <syntaxhighlight lang='C'> | ||
float u = float(@ptnum)/(@numpt-1); | float u = float(@ptnum)/(@numpt-1); | ||
| Line 253: | Line 530: | ||
@P.y += sin(u*q) * (cos(u*p)+r); | @P.y += sin(u*q) * (cos(u*p)+r); | ||
@P.z += sin(u*p); | @P.z += sin(u*p); | ||
</syntaxhighlight> | |||
== Remap Grid to Circle == | |||
[[File:vex_map_grid_to_circle.gif | 340px | right]] | |||
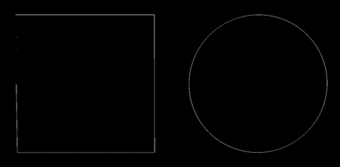
Working with polar coordinates to map a square onto a circle. | |||
[[:File:vex_map_grid_to_circle.hiplc|vex_map_grid_to_circle.hiplc]] | |||
<syntaxhighlight lang='C'> | |||
@P += {0.5, 0.5, 0}; // Remap the grid to zero to one range | |||
float theta = @P.x; | |||
float radius = @P.y/2; | |||
@P = 0; | |||
@P.x = sin(theta*PI*2 ) * radius; | |||
@P.y = cos(theta*PI*2 ) * radius; | |||
</syntaxhighlight> | |||
== Remap Grid to Sphere == | |||
[[File:vex_map_grid_to_sphere.gif | 340px | right]] | |||
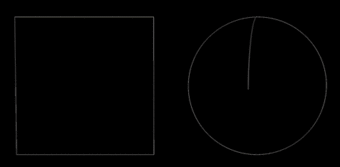
Working with polar coordinates to map a square onto a sphere. | |||
[[:File:vex_map_grid_to_sphere.hiplc|vex_map_grid_to_sphere.hiplc]] | |||
<syntaxhighlight lang='C'> | |||
@P += {0.5, 0.5, 0}; // Remap the grid to zero to one range | |||
float phi = @P.x; | |||
float theta = 1.0-@P.y; | |||
@P.x = sin(theta*PI*1 ) * cos(phi*PI*2 )/2; | |||
@P.z = sin(theta*PI*1 ) * sin(phi*PI*2 )/2; | |||
@P.y = cos(theta*PI*1 )/2; | |||
</syntaxhighlight> | |||
== Make a Quad == | |||
<syntaxhighlight lang='C'> | |||
int prim = addprim(0,'poly'); | |||
addvertex(0,prim,addpoint(0,set(0,0,0)) ); | |||
addvertex(0,prim,addpoint(0,set(1,0,0)) ); | |||
addvertex(0,prim,addpoint(0,set(1,0,1)) ); | |||
addvertex(0,prim,addpoint(0,set(0,0,1)) ); | |||
</syntaxhighlight> | |||
== Make a Grid == | |||
<syntaxhighlight lang='C'> | |||
for(int i = 0; i<8; i++)Â Â { | |||
  for(int j = 0; j<8; j++)  { | |||
    int prim = addprim(0,'poly'); | |||
    addvertex(0,prim,addpoint(0,set(i,0,j)) ); | |||
    addvertex(0,prim,addpoint(0,set(i+1,0,j)) ); | |||
    addvertex(0,prim,addpoint(0,set(i+1,0,j+1)) ); | |||
    addvertex(0,prim,addpoint(0,set(i,0,j+1)) ); | |||
  } | |||
} | |||
</syntaxhighlight> | </syntaxhighlight> | ||
== Make a Circle == | == Make a Circle == | ||
[[File:vex_make_circle.gif | 300px | right]] | |||
This example shows how you can generate a circle or N sided polygon using a for loop, sin and cos. | |||
Run the code in detail mode with an attribute wrangle. | |||
This is essentially the same idea as the [https://www.sidefx.com/docs/houdini/nodes/sop/circle.html circle] node but hopefully a beneficial example to see how this type of geometry is generated via VEX. | |||
[[:File:vex_make_circle_001.hiplc|vex_make_circle_001.hiplc]] | |||
<syntaxhighlight lang='C'> | <syntaxhighlight lang='C'> | ||
int prim = addprim(0,'poly'); | int prim = addprim(0,'poly'); | ||
int seg = chi('segments'); | int seg = chi('segments'); | ||
| Line 284: | Line 634: | ||
s@number = elemnum; | s@number = elemnum; | ||
</syntaxhighlight> | </syntaxhighlight> | ||
== Looping Curl Noise == | |||
[[File:2022_12_11_looping_curl_noise.gif | 340px | right]] | |||
It's possible to achieve seamless looping animation from curl noise by blending between two noises. | |||
In this example one noise function is evaluated at the current time, and a second noise function is evaluated at the time shifted back by the desired loop duration. | |||
The result of these two noise functions are blended from one to the other over the duration. | |||
[[:File:vex_looping_noises.hiplc|vex_looping_noises.hiplc]] | |||
<syntaxhighlight lang='C'> | |||
// Position x Frequency | |||
vector p = @P*0.5; | |||
// Speed | |||
float s = 0.5; | |||
// Loop Length (in seconds) | |||
float l = 5; | |||
// Time % duration | |||
float t = (@Time%l); | |||
// Blending | |||
vector v0 = curlgxnoise(p + set(0,0,0,t*s)); | |||
vector v1 = curlgxnoise(p + set(0,0,0,(t-l)*s)); | |||
@P += lerp(v0,v1,frac(@Time/l)) * 0.35; | |||
</syntaxhighlight> | |||
<!--== Make a Grid == | |||
for(int j = 0; j<4; j++)Â Â { | |||
  int prim = addprim(0,'poly'); | |||
  addvertex(0,prim,addpoint(0,set(i,0,j)) ); | |||
  addvertex(0,prim,addpoint(0,set(i+1,0,j)) ); | |||
  addvertex(0,prim,addpoint(0,set(i+1,0,j+1)) ); | |||
  addvertex(0,prim,addpoint(0,set(i,0,j+1)) ); | |||
}--> | |||
Latest revision as of 10:05, 3 October 2024
Translate
Offset the position of geometry
@P += {1, 0, 0};
Taper
Reduces the circumference by scaling along the XZ plane based on the height of the geometry.
float taper = relbbox(0,@P).y;
// Remap the taper range
taper = fit01(taper, 1, fit01(sin(@Time*PI/5)*0.5+0.5, 2.5, .5));
// Apply the taper by scaling along the X and Y axis
@P *= set(taper,1,taper);
Boxify
Distorts the geometry, morphing it into a box shape
vector centroid = getbbox_center(0);
vector size = getbbox_size(0);
size = min(size); // Largest component
@P -= centroid;
@P *= (1.0/size);
@P = lerp(@P, @P+clamp(normalize(@P)*1.75,vector(-1),vector(1)) * (1.0-length(max(abs(@P)))), chf('blend'));
@P *= size;
@P += centroid;
Spherify
Distorts the geometry into a sphere shape
vector centroid = getbbox_center(0);
vector size = getbbox_size(0);
size = min(size); // Largest component
@P -= centroid;
@P *= (1.0/size);
@P = lerp(@P, normalize(@P), chf('blend'));
@P *= size;
@P += centroid;
Stretch
Stretch the geometry across it's X axis
Add one component of position to itself to stretch the geometry away from it's center. You can control the amount of stretching by multiplying the position before adding it to itself.
vector centroid = getbbox_center(0);
@P -= centroid;
@P.x += @P.x*chf('amt');
@P += centroid;
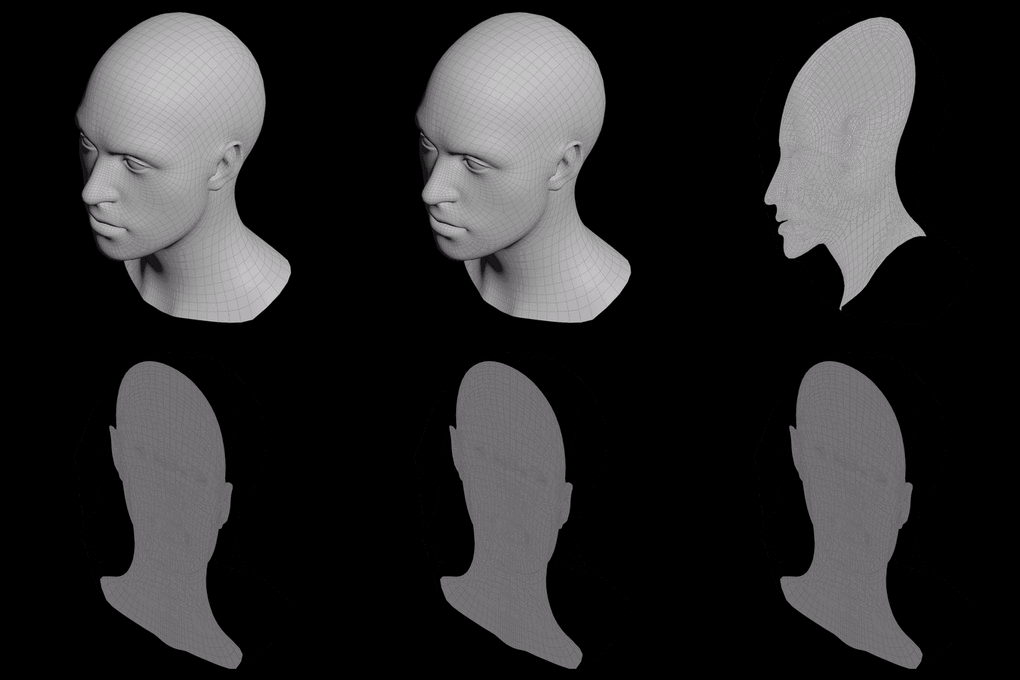
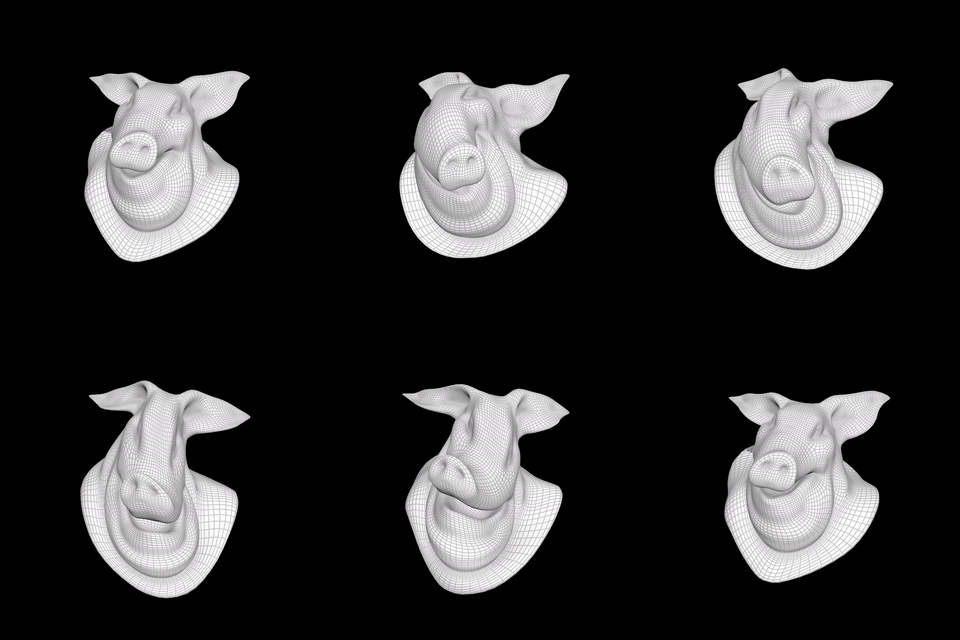
Shape Blending
Blend between point attributes to produce a morph effect
@P = lerp(@P, @opinput1_P, chf('blend'));
@N = lerp(@N, @opinput1_N, chf('blend'));
Snap to Grid
Snap (quantize) point positions to a grid for a downres effect
float grid_scale = chf('grid_scale');
@P = rint(@P*grid_scale)/grid_scale;
Make 2D
You can use the setcomp function to zero out a component of a vector, resulting in a two dimensional surface.
// Set the X component to zero, planar 2D in YZ
setcomp(@P, 0, 0);
// Set the Y component to zero, planar 2D in XZ
setcomp(@P, 0, 1);
// Set the Z component to zero, planar 2D in XY
setcomp(@P, 0, 2);
Swizzle Coordinate System
Shuffle the components of a vector using swizzle
vex_swizzle_vector_components.hiplc
@P = @P.zyx;
Twirl
Twirl the geometry around the Y axis
float a = chf('angle') * length(@P * {1, 0, 1});
float u = atan2(@P.x, @P.z);
float r = length(@P * {1, 0, 1});
@P = set(sin(u-a), @P.y, cos(u-a)) * set(r,1,r);
Peak
Move the surface along it's normals, producing an inflation effect
vex_push_surface_along_normals.hip
@P += normalize(@P) * chf('scale');
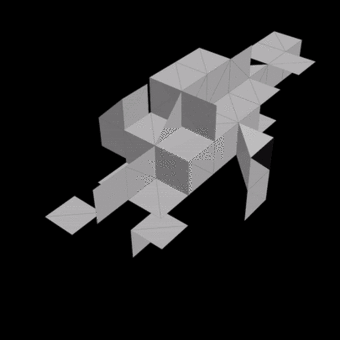
Exploded View
Moves each packed piece outward from the geometry centroid
@P += (@P - getbbox_center(0)) * chf('scale');
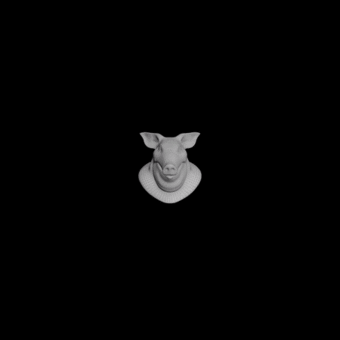
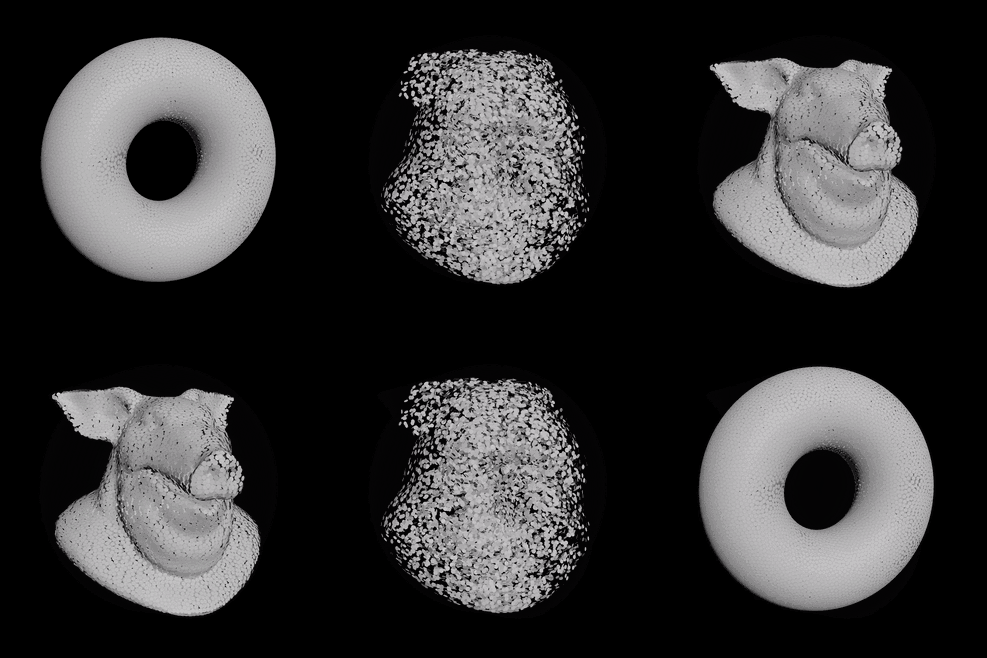
Point Jitter
Move each point in a random direction with a spherical distribution
@P += sample_sphere_uniform(rand(@elemnum+chf('seed'))) * chf('scale');
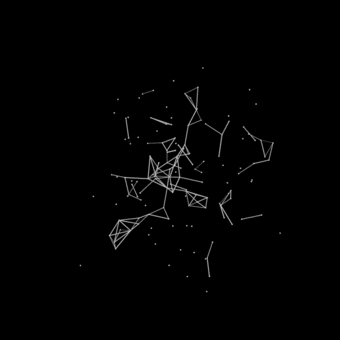
Plexus Effect
Connect nearby points
foreach(int pt; nearpoints(0, @P, 0.15, 10))    {
    if(pt > @ptnum)
        addprim(0, 'polyline', @ptnum, pt);
}
Connect to Nearest Point
Draw a line to the closest point of the second input
addprim(0, 'polyline', @ptnum, addpoint(0, vector(point(1,'P',nearpoint(1,@P)))) );
Connect to Closest Surface Position
Draw a line to the closest surface position
addprim(0, 'polyline', @ptnum, addpoint(0, minpos(1,@P) );
Randomize the Rotation of Packed Primitives
Update the transform intrinsic to a random orientation
vector r = sample_direction_uniform(rand(@primnum));
matrix3 x = primintrinsic(0,'transform',i@primnum);
rotate(x, PI*pow(rand(@primnum-666),0.5), r);
setprimintrinsic(0,'transform',i@primnum,x);
Randomize the Scale of Packed Primitives
Update the transform intrinsic to a apply a random scale
vector s = rand(i@primnum);
s = s.yyy;  // Uniform Scale
matrix3 x = primintrinsic(0,'transform',i@primnum);
scale(x, s);
setprimintrinsic(0,'transform',i@primnum,x);
Random Color from Normal Direction
Generate random colors based on the surface normal, adjust the multiplier to control the amount of colors
vex_rand_color_from_normal_direction.hiplc
v@Cd = rand(rint(@N*2));
int isBorderEdge(int pt0, pt1)  {   // test border using half edges
    int hedge = pointhedge(0, pt0, pt1); // try finding hedge
    if (hedge == -1 )   {
        hedge = pointhedge(0, pt1, pt0);  // try reversed hedge
        if (hedge == -1 ) return -1;  // invalid hedge
    }
    return hedge_equivcount(0, hedge) == 1; // 1 if border edge
}

int pps[] = primpoints(0,@primnum); // current primitive's points
for(int i = 0; i<len(pps);  i++)   {
    int pt0 = pps[i]; // current pt
    int pt1 = pps[(i-1)%len(pps)]; // next point
    if( isBorderEdge(pt0, pt1) ) { setpointgroup(0, 'border', pps[i], 1); }
}
Iterative Face Insetting
Recursive divide and inset edges, via @d_gfx, excellent use of arrays
int pts[] = primpoints(0,@primnum); vector pos[];
int edge_div_pts[]; vector edge_div_pos[];
foreach( int pt; pts )
    append(pos, vector(point(0,'P',pt)));
for( int i = 0; i < chi('iterations'); i++ )    {
    resize(edge_div_pts,0); // empty
    resize(edge_div_pos,0); // empty
    for( int j = 0; j < len(pts); j++ ) {
        append(edge_div_pos, lerp( pos[j], pos[(j+1)%len(pts)], chf('div_ratio') ));
        append(edge_div_pts, addpoint(0, edge_div_pos[-1])); // [-1] grabs the last item from an array
    }
    for (int k = 0; k < len(pts); k++ ) {
        addprim(0, 'poly', pts[k], edge_div_pts[k], edge_div_pts[(k+2)%len(pts)]);
    }
    pts = edge_div_pts;
    pos = edge_div_pos;
}
addprim(0, 'poly', edge_div_pts);
removeprim(0,@primnum,1); // Remove the input prim and any points belonging to it
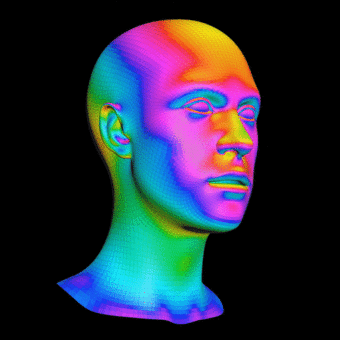
Iridescent Color Function
Produce an iridescent color ramp from any varying value, from shadertoy
float amt = dot(@N, set(0,1,0))*0.5+0.5;
v@Cd =  (0.5 + 0.5 * cos( PI*2*( amt + set(0,1,2)/3) ) );
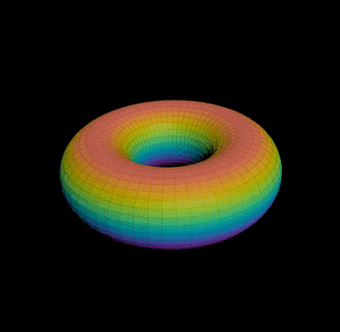
Rainbow Colors from HSV Colorspace
You can easily control the hue, while keeping the saturation and value the same using the hsvtorgb function.
This allows you to easily create rainbows, gradients, perform hue rotations and produce complimentary colors.
vex_hsvtorgb_rainbow_001.hiplc
v@Cd = hsvtorgb( set(relbbox(0,@P).z - @Time/5 + dot(@N,set(0,1,0))/2, 1, 1));
Rainbow Cycle with frac function
Using the frac function, you can cycle through a rainbow over a desired amount of elements.
This is then offset by adding the current time to the fractional value, which produces the scrolling effect.
vex_frac_rainbow_cycle_001.hiplc
v@Cd = hsvtorgb(set(frac(@elemnum/8.0)+@Time/10, 1, 1));
Loop Over All Attributes
string pt_attrs[] = detailintrinsic(1,'pointattributes');
foreach( string pt_attr; pt_attrs ) {
    if( pt_attr ~= 'attr_name*' ) {
        setpointgroup(0, pt_attr, @ptnum, 1);
    }
}
Remove Faces Across Bounding Box
if( relbbox(0,@P).x < rand(@primnum) )
    removeprim(0,@primnum,1);
Torus Knot
float u = float(@ptnum)/(@numpt-1);
u += @Time/10.0;
u %= 1.0;
u *= PI * 2;
float r = 2.0;
float q = 2;
float p = 3;
f@u = u;
@P.x += cos(u*q) * (cos(u*p)+r);
@P.y += sin(u*q) * (cos(u*p)+r);
@P.z += sin(u*p);
Remap Grid to Circle
Working with polar coordinates to map a square onto a circle.
@P += {0.5, 0.5, 0}; // Remap the grid to zero to one range
float theta = @P.x;
float radius = @P.y/2;
@P = 0;
@P.x = sin(theta*PI*2 ) * radius;
@P.y = cos(theta*PI*2 ) * radius;
Remap Grid to Sphere
Working with polar coordinates to map a square onto a sphere.
@P += {0.5, 0.5, 0}; // Remap the grid to zero to one range
float phi = @P.x;
float theta = 1.0-@P.y;
@P.x = sin(theta*PI*1 ) * cos(phi*PI*2 )/2;
@P.z = sin(theta*PI*1 ) * sin(phi*PI*2 )/2;
@P.y = cos(theta*PI*1 )/2;
Make a Quad
int prim = addprim(0,'poly');
addvertex(0,prim,addpoint(0,set(0,0,0)) );
addvertex(0,prim,addpoint(0,set(1,0,0)) );
addvertex(0,prim,addpoint(0,set(1,0,1)) );
addvertex(0,prim,addpoint(0,set(0,0,1)) );
Make a Grid
for(int i = 0; i<8; i++)    {
    for(int j = 0; j<8; j++)    {
        int prim = addprim(0,'poly');
        addvertex(0,prim,addpoint(0,set(i,0,j)) );
        addvertex(0,prim,addpoint(0,set(i+1,0,j)) );
        addvertex(0,prim,addpoint(0,set(i+1,0,j+1)) );
        addvertex(0,prim,addpoint(0,set(i,0,j+1)) );
    }
}
Make a Circle
This example shows how you can generate a circle or N sided polygon using a for loop, sin and cos.
Run the code in detail mode with an attribute wrangle.
This is essentially the same idea as the circle node but hopefully a beneficial example to see how this type of geometry is generated via VEX.
int prim = addprim(0,'poly');
int seg = chi('segments');
for( int i = 0; i<seg; i++ )  {
    float u = float(i)/seg * 2*PI;
    addvertex(0, prim, addpoint(0, set(sin(u),0,cos(u))) );
}
Groups to Attribute
//convert numbered groups to a numbered attribute
string groups[] = detailintrinsic(0, "primitivegroups");
int prim = @primnum;
string elemnum;

foreach(string i; groups)
{
    //if the current primitive is in group i
    if(inprimgroup(0,i,prim) == 1)
    {
        elemnum = re_find(r"\d{3,6}",i);
    }
}
s@number = elemnum;
Looping Curl Noise
It's possible to achieve seamless looping animation from curl noise by blending between two noises.
In this example one noise function is evaluated at the current time, and a second noise function is evaluated at the time shifted back by the desired loop duration.
The result of these two noise functions are blended from one to the other over the duration.
// Position x Frequency
vector p = @P*0.5;
// Speed
float s = 0.5;
// Loop Length (in seconds)
float l = 5;
// Time % duration
float t = (@Time%l);
// Blending
vector v0 = curlgxnoise(p + set(0,0,0,t*s));
vector v1 = curlgxnoise(p + set(0,0,0,(t-l)*s));
@P += lerp(v0,v1,frac(@Time/l)) * 0.35;
