Difference between revisions of "Live 2022.08.23"
From kunz
Views
Actions
Namespaces
Variants
Tools
| Line 14: | Line 14: | ||
[[File:Screenshot_at_2022-09-09_13-00-32.png | 900px]] | [[File:Screenshot_at_2022-09-09_13-00-32.png | 900px]] | ||
== Video On Demand == | == Video On Demand == | ||
| Line 31: | Line 28: | ||
* 1:03:00 Adding studio backdrop geometry | * 1:03:00 Adding studio backdrop geometry | ||
* 1:16:00 Adjusting camera composition and render settings | * 1:16:00 Adjusting camera composition and render settings | ||
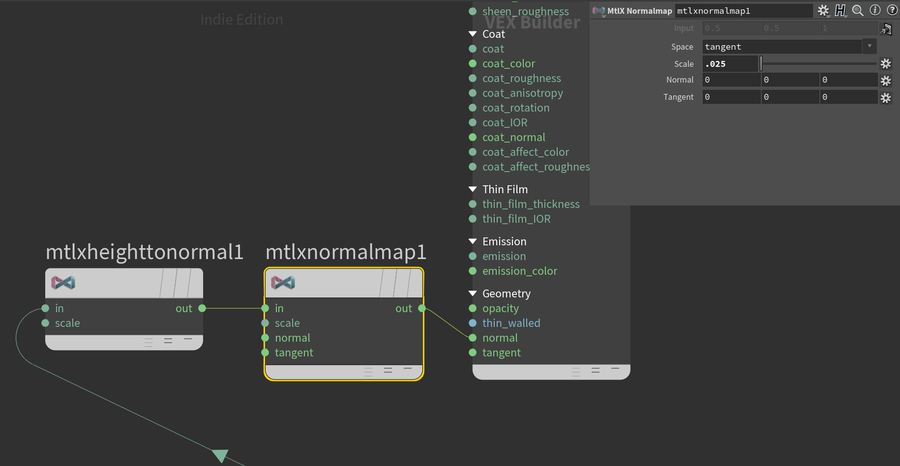
During the live stream, I didn't connect the height to normal node properly which was causing the shading artifacts. To fix this, you can add a normal map node in between the shader connection like so. | |||
[[File:Screenshot_at_2022-09-09_14-39-32.png | 900px]] | |||
== Additional Images == | == Additional Images == | ||
Revision as of 13:45, 9 September 2022
Shading techniques for Solaris, USD and MaterialX
Scene File
Download the Houdini file: 2022_08_23_materialx_USD_008.hiplc
Summary
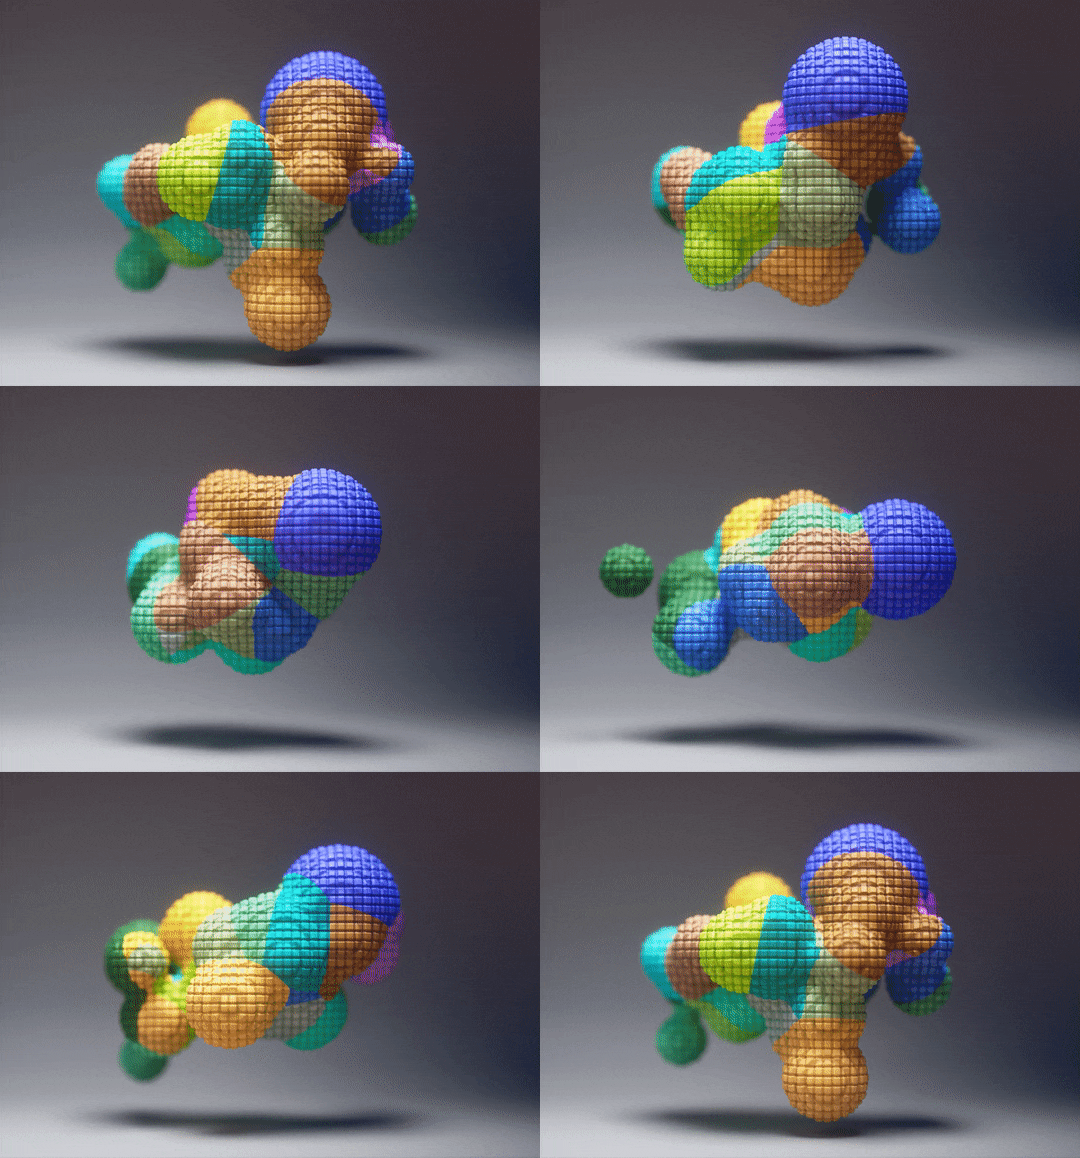
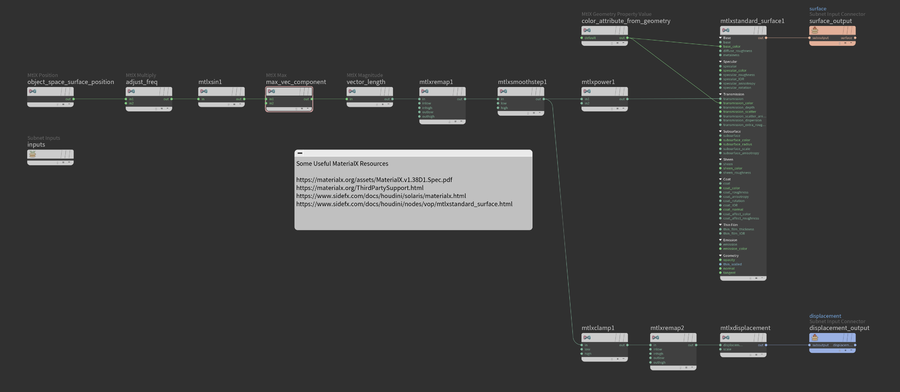
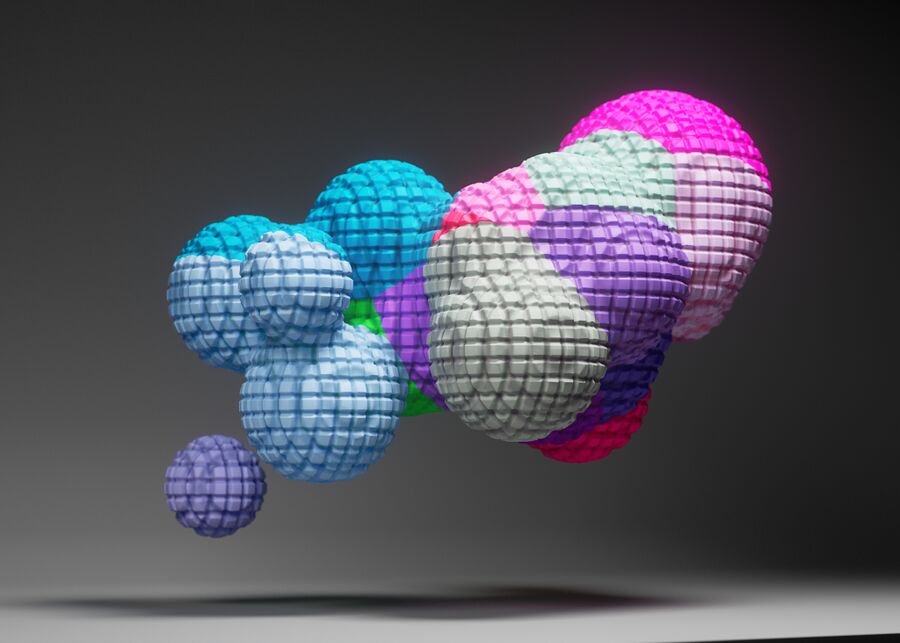
Building a shader from scratch in Solaris with MaterialX. The color values are retrieved from the geometry "Cd" attribute and the displacement pattern is generated using MaterialX math nodes to remap the surface position to a waffle grid-like bumpy pattern.
Below is the MaterialX shading network.
Video On Demand
- 00:00 Solaris LOP Stage introduction
- 02:50 LOP node concepts
- 09:10 Making a MaterialX shader
- 14:30 Using geometry attributes in MaterialX
- 15:30 Using other geometry properties to generate patterns
- 24:10 Enabling ACES through the SideFX Labs menu
- 34:40 Modeling a blobby shape
- 45:10 Adjusting lights and materials for the blobby shape
- 1:00:00 Looking at the structure of USD files
- 1:03:00 Adding studio backdrop geometry
- 1:16:00 Adjusting camera composition and render settings
During the live stream, I didn't connect the height to normal node properly which was causing the shading artifacts. To fix this, you can add a normal map node in between the shader connection like so.
